Data modelling
Contents
Model editor
Opening model editor for user's project: go to My projects > click on project name.
Opening model editor for team project: go to My projects > go to left panel > go to My team projects > click on project name.
Main parts of the editor:
- Main menu
- Main toolbar
- Model explorer - Left pane shows model structure in the form of a tree.
- Properties window which displays properties of currently selected model node.
Main menu
Main menu contains the following items:
- "File" - File operations.
- "Edit" - Model editing operations.
- "Help" - Displaying information about ecFeed.
- "View" - Changing model view.
File menu
File menu contains the following items:
- "Save" - Saving current model state.
- "Switch to edit mode"- Switching the editor to edit mode from read-only mode.
- "Import model" - Importing model from xml file.
- "Export model" - Exporting current state of model to an xml file.
Edit menu
Edit menu contains the following items:
- "Copy" - Copying one model node or multiple nodes into copy buffer.
- "Paste"- Pasting the copy buffer into model.
- "Undo" - Undoing the last operation.
- "Redo" - Redoing the last undo operation.
View menu
View menu contains the following items:
- "Simple" - Switching the editor to simple mode.
- "Java"- Switching the editor to Java mode.
Main toolbar
Main toolbar contains the following icons:
- "Save" - Saving current model state.
- "Copy" - Copying one model node or multiple nodes into copy buffer.
- "Paste"- Pasting the copy buffer into model.
- "Undo" - Undoing the last operation.
- "Redo" - Redoing the last undo operation.
- "About" - Displaying information about ecFeed.
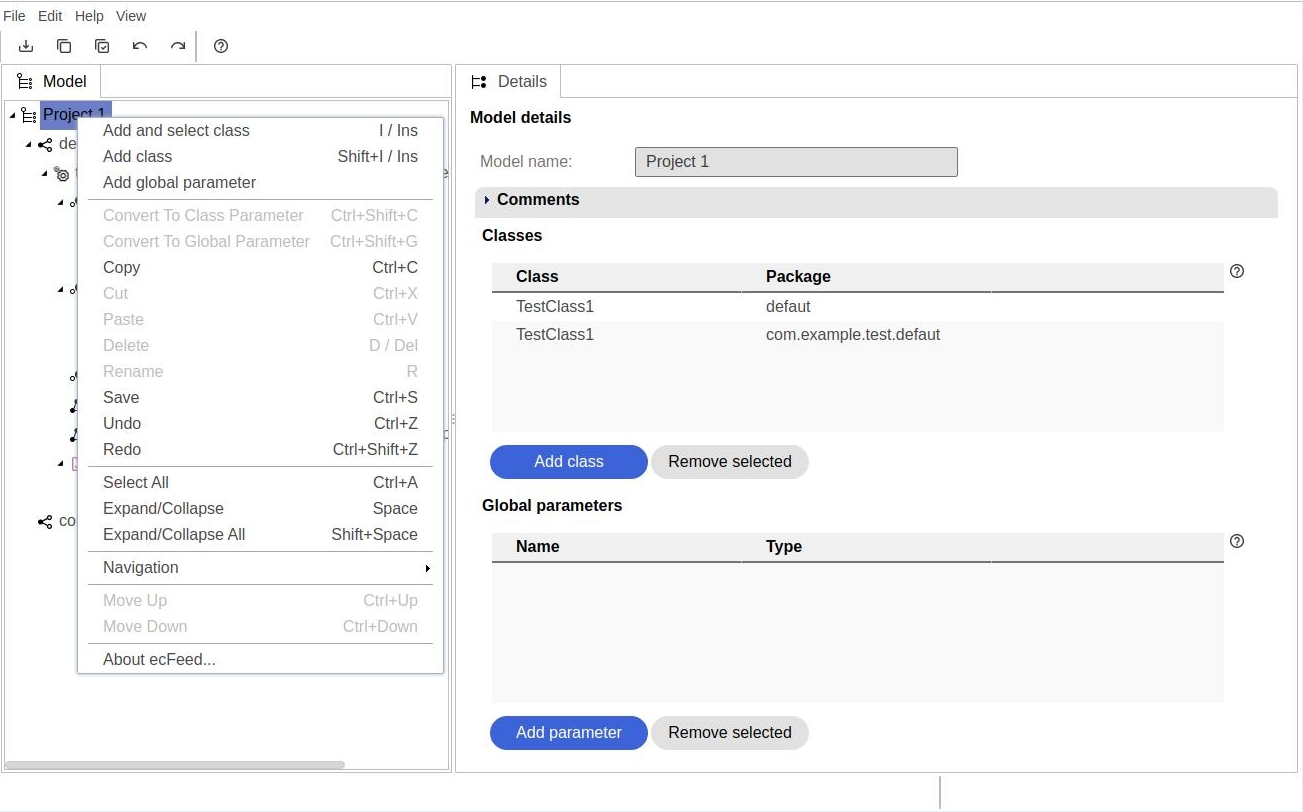
Context menu
Context menu is available in model explorer. It displays operations:
- Available globally - Save, Undo, Redo etc.
- Available for currently selected node.
Displaying context menu: move mouse over node > mouse right click.
Model view modes
Model can be viewed in two modes:
- Simple mode
- Java mode
Java mode requires Java syntax and Java data types when defining some nodes of the model. Simple can be used by non programmers. This mode uses general types like Number, Text, Logical.
Switching to Simple view mode: go to Main menu > go to View menu > select "Simple" option.

Switching to Java view mode: to to Main menu > go to View menu > select "Java" option.
Differences in view modes
In Simple view mode:
- Types are simplified: Number, Text.
- Actual numeric values are used.
- User cannot define his own types.
- Package name for class is not displayed.
In Java view
- Java types should be used.
- Symbolic numeric values are used (MAX_DOUBLE etc.)
- Names for classes, methods and method parameters must meet the requirements of Java naming syntax.
- Package name for class should be filled.
Edit modes
Model editor has two edit modes: "Edit" and "Read only".
User will be limited to Read only mode in the following situations:
- The 30 days period of Free user license has expired.
- User has no privileges to edit team model.
- The model is currently edited in another browser window (the same model must not be edited in the same time by two model editors).
Types of nodes
ecFeed has the following node types:
- Root node - This is the starting point for the model.
- Class nodes - Class nodes are listed under root node. They group test function nodes.
- Method nodes - Method nodes contain functions which are executed to perform tests.
- Method argument nodes - These nodes contain descriptions of method arguments.
- Choice nodes - Choice nodes contain values which are used during test execution.
- Constraint nodes - Constraint nodes contain logical conditions which are used during test execution.
- Test case nodes - Test case nodes contain generated data, which can be used to perform tests.
- Test suite nodes - These nodes are used to group test case nodes what simplifies model navigation.
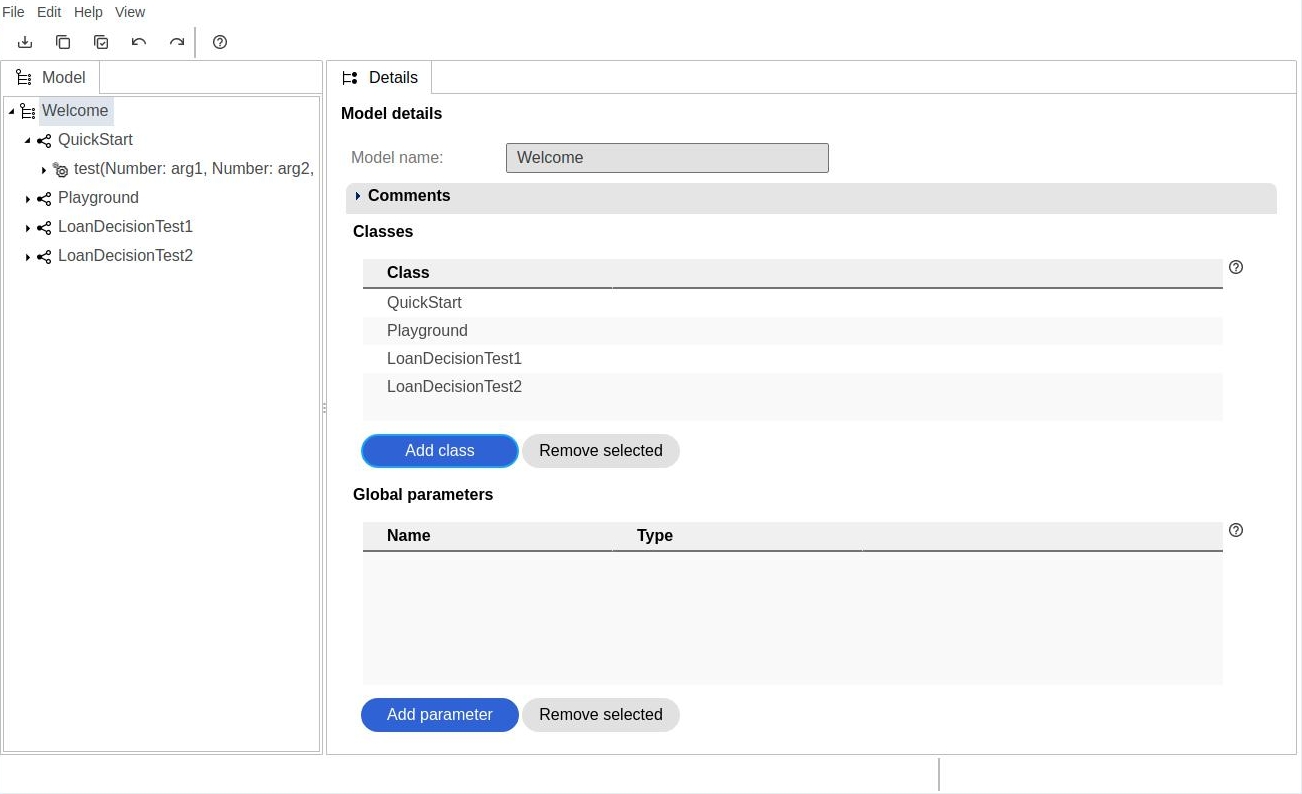
Root node
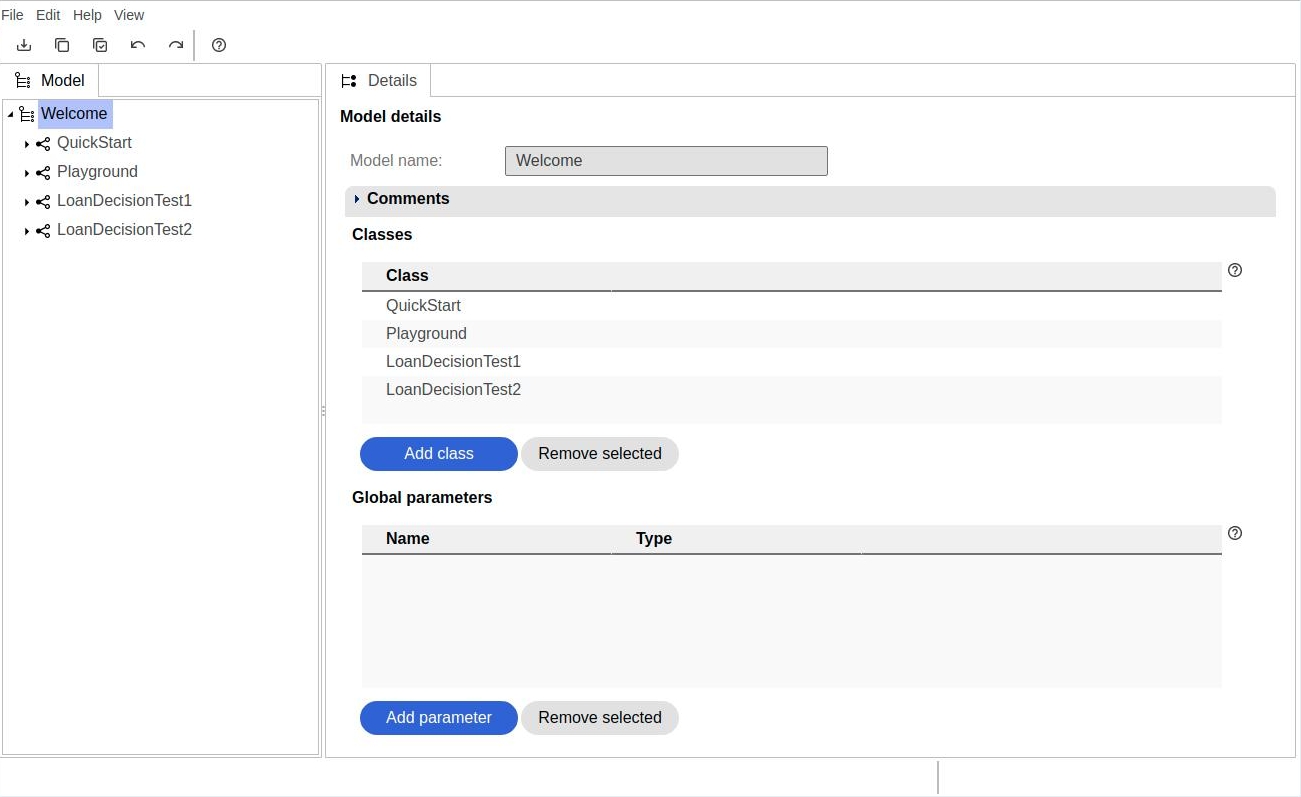
Root is on top of project structure. Its only property is name - label "Model name". Model name cannot be edited in model editor.
It can have the following child nodes:
- Class nodes.
- Global parameter nodes (these nodes will be described later).
Child nodes are displayed in model tree under the root node, and also in properties window, in sections "Classes" and "Global parameters".
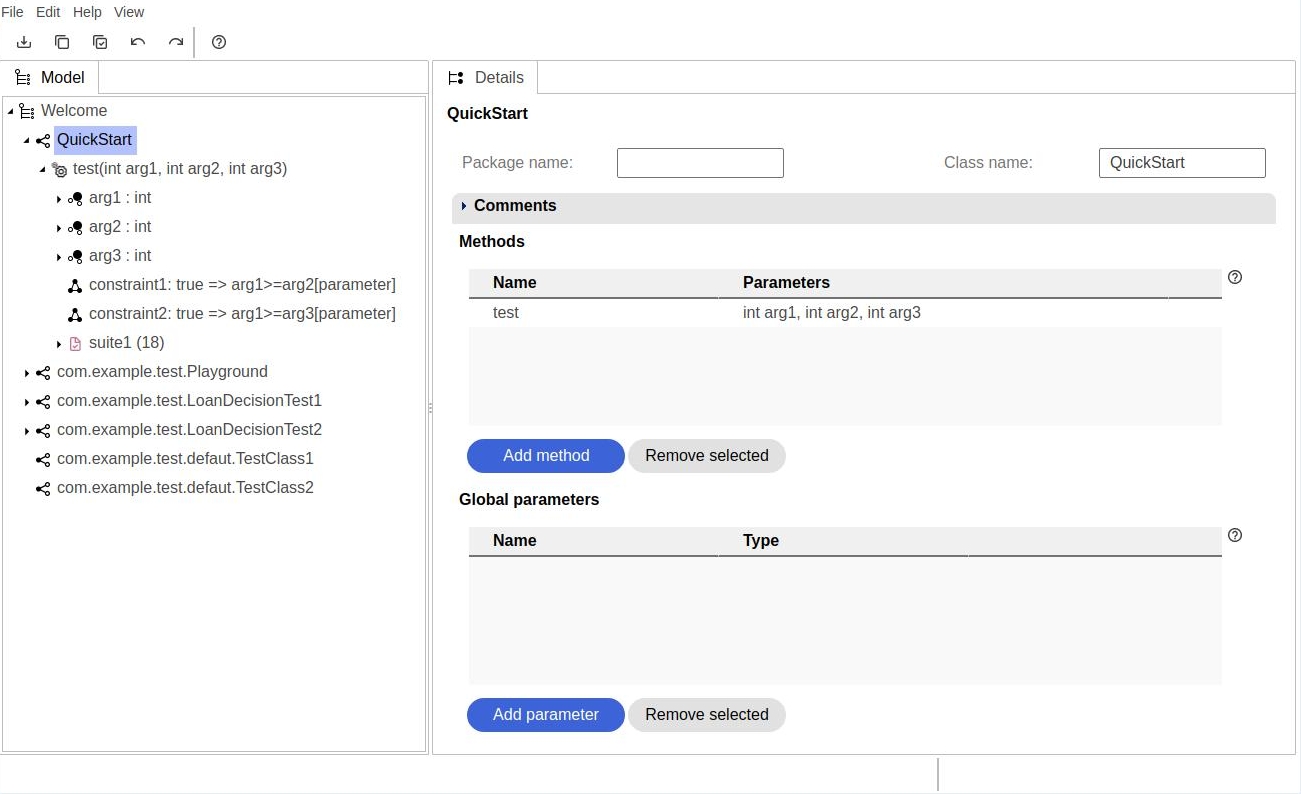
Class node
Class node is a child of root node. It groups test functions. The properties of class node are:
- Package name - This field can be left with default value.
- Class name.
Class nodes can have the following child nodes:
- Method nodes.
- Global parameter nodes (described later).
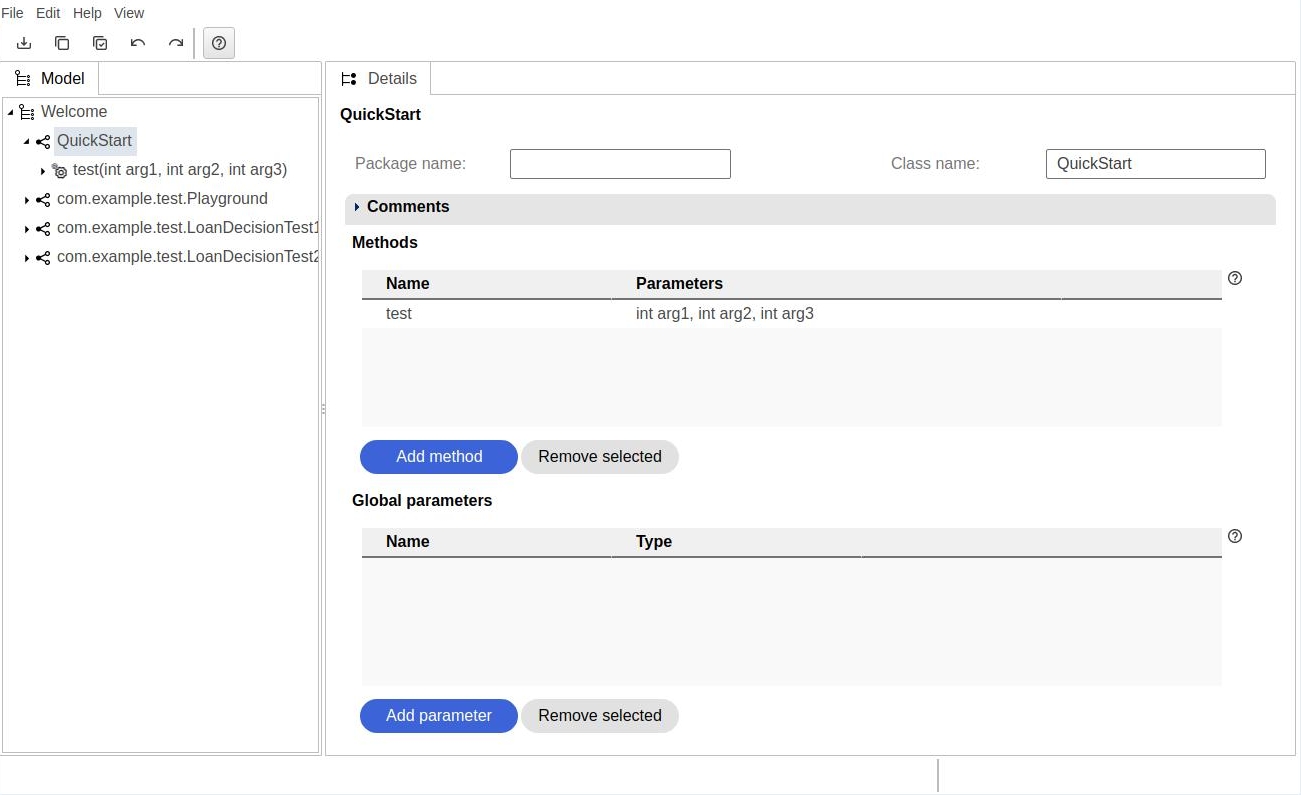
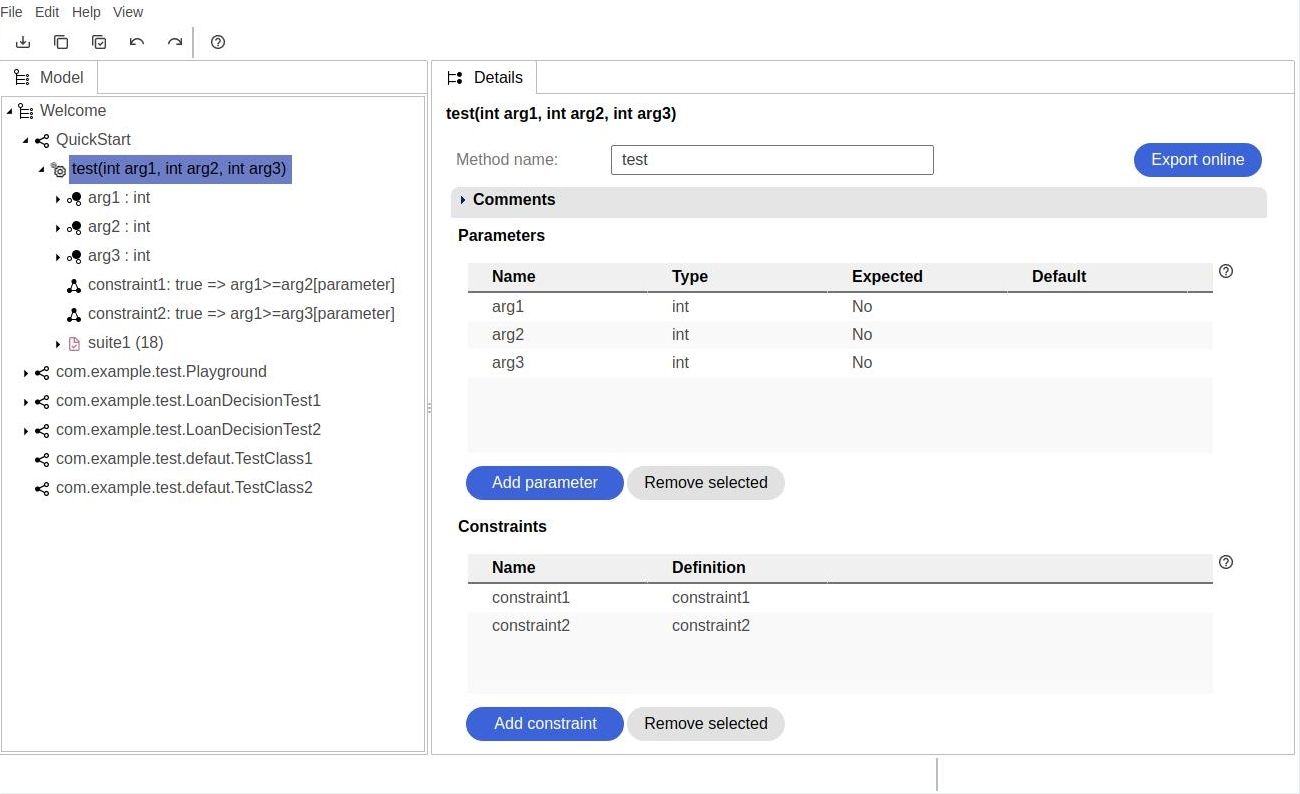
Method node
Method node is a child of class node. It represents test function which will be run on tested system.
The only property of method node is its name.
Method can have the following child nodes:
- Method parameters.
- Constraints
- Test suites which group test cases to run on tested system.
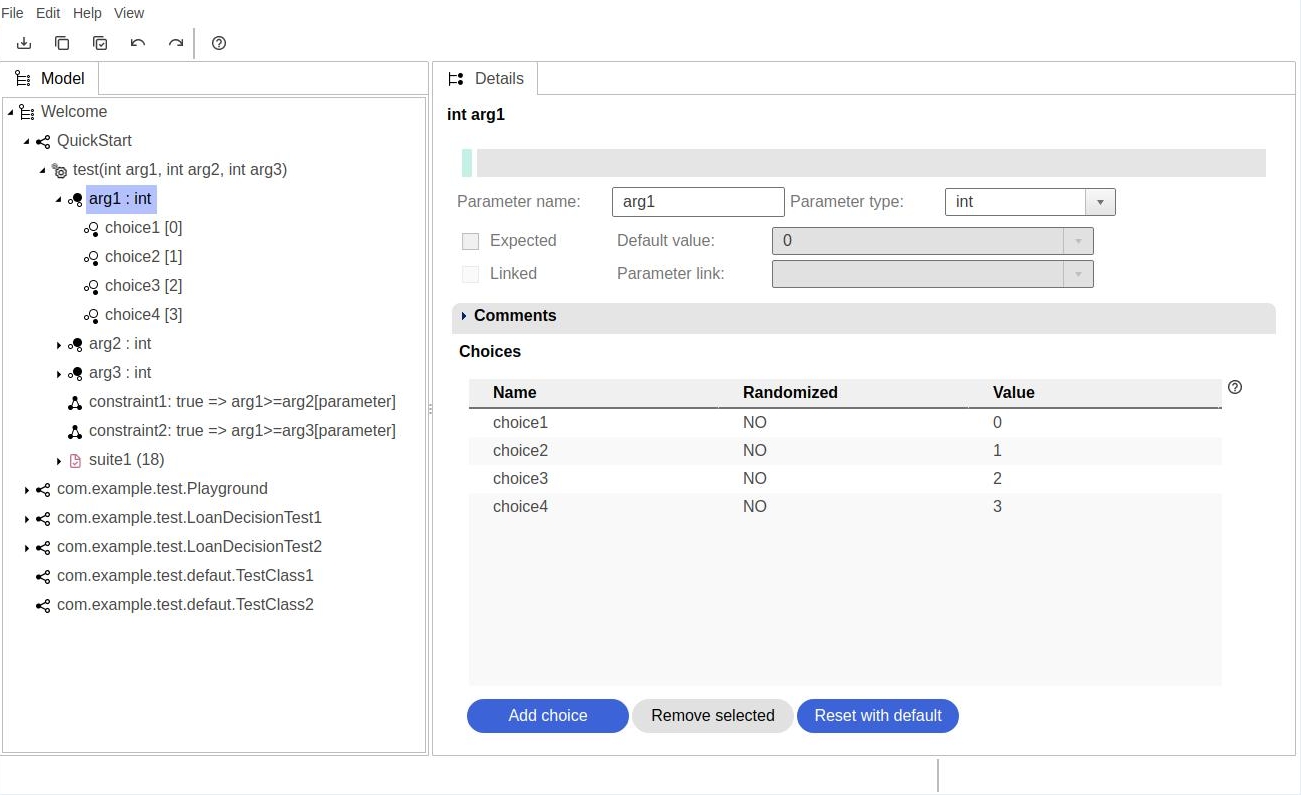
Method parameter node
Method parameter node is a child of:
- Method node.
- Class node.
- Root node.
It represents one parameter of test function.
It has the following properties:
- Name.
- Type.
- "Expected" checkbox.
- Default value.
- Linked.
- Link.
Method parameters can have the following child nodes:
- Choice nodes.
Parameter types
Available parameter types in Java view mode are:
- byte
- short
- int
- long
- float
- double
- char
- String
- boolean
- user defined types
Available parameter types in Simple view mode are:
- Number
- Text
- Logical
It is also possible to define user types. User type is a text for example: DocumentType. User types are not randomized and their values are translated to text.
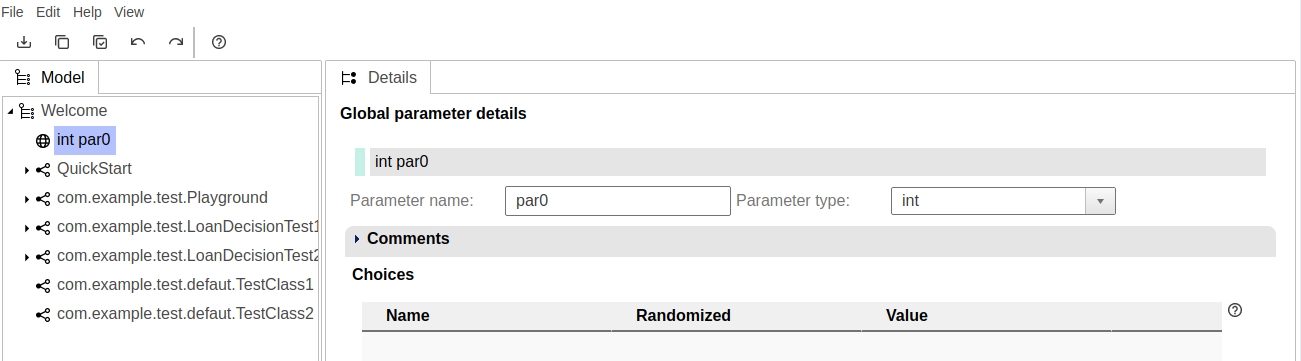
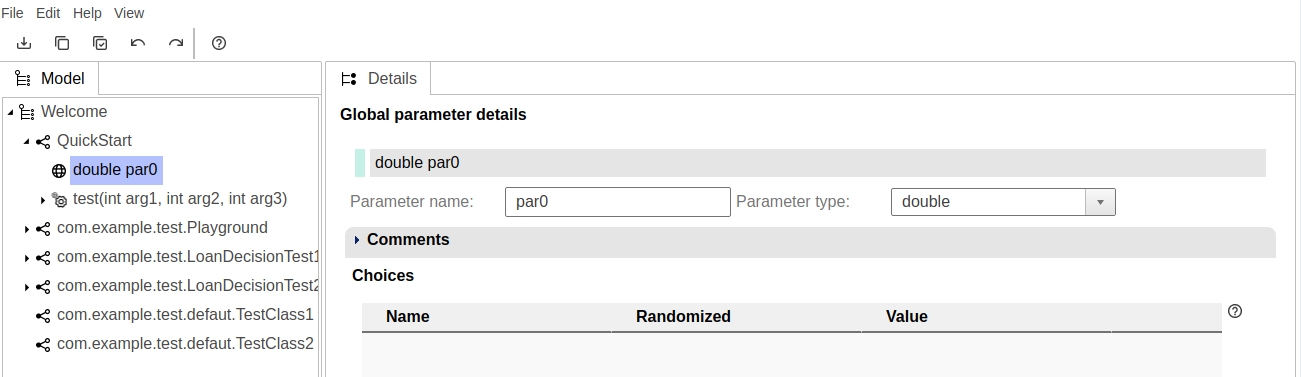
Global parameters
If a parameter is used multiple times in various methods, it can be placed under root node or class node.
In this case it called a global parameter.
Global parameters placed under root node can be accessed everywhere in model.
Global parameters placed under class node an be accessed by methods of this class only.
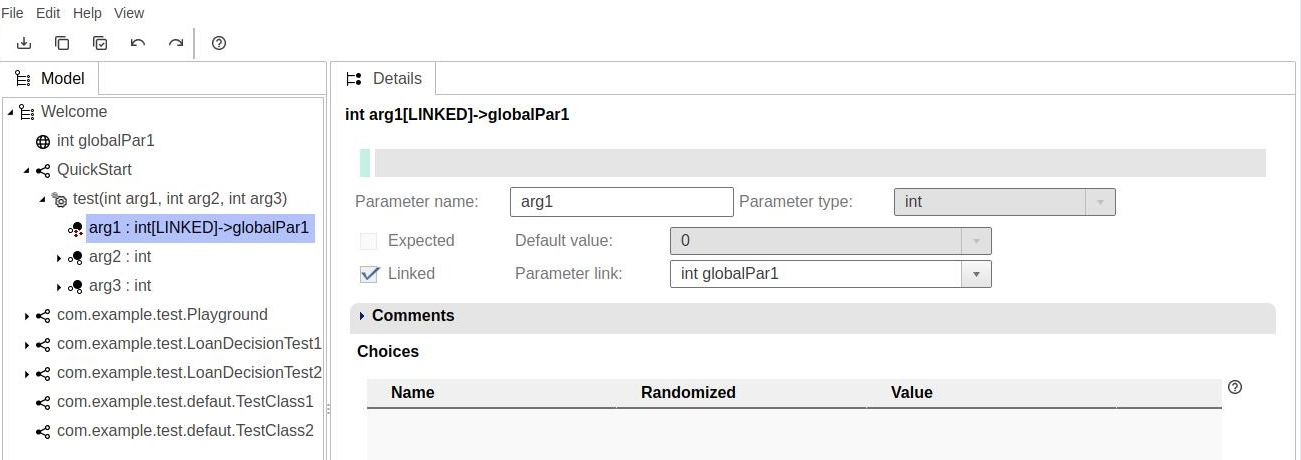
Linking to global parameters
In order to use global parameter in functions, checkbox "Linked" in the properties of the parameters should be checked. Also one of available global parameters should be selected.
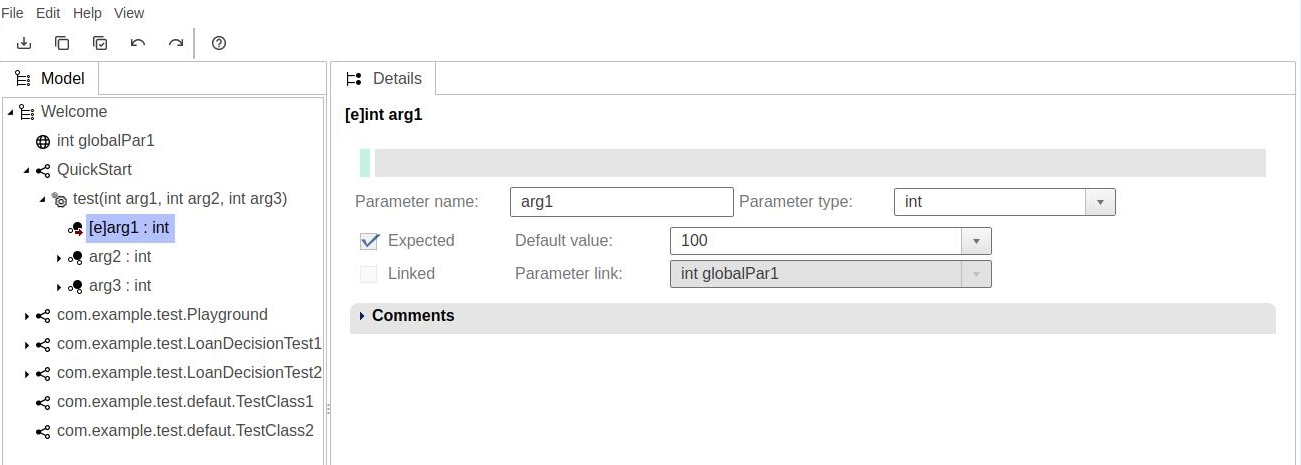
Expected parameters
The value of an expected parameter is calculated by system during test data generation process.
First system takes source data from generated test case. Then the value is calculated with the use of logic conditions - constraints (described later), Next the calculated value is placed in the test case, at position of the expected parameter.
Calculated expected value can be used in testing function to check if the response of tested system matches expected value.
Choices
Choices represent subsets of all possible parameter values. A choice has a name and value. For example for a parameter named "familyName" of type String/Text we could have the following choices and values: short (Smith), long single word (Rockefeller), long complex (Mendhelsson-Bartholdy), two words (van Beethoven), more than two words (van der Sar), invalid ($@1%&*).
Choice special values
In Java view mode. choices can have also symbolic values which depend on type of method parameter:
- byte, int, short long (MIN-VALUE, MAX-VALUE)
- float, double (MIN-VALUE, MAX-VALUE, -MIN-VALUE, -MAX-VALUE)
- String parameter(/null)
- boolean (true, false)
Special values can be selected from combo box.
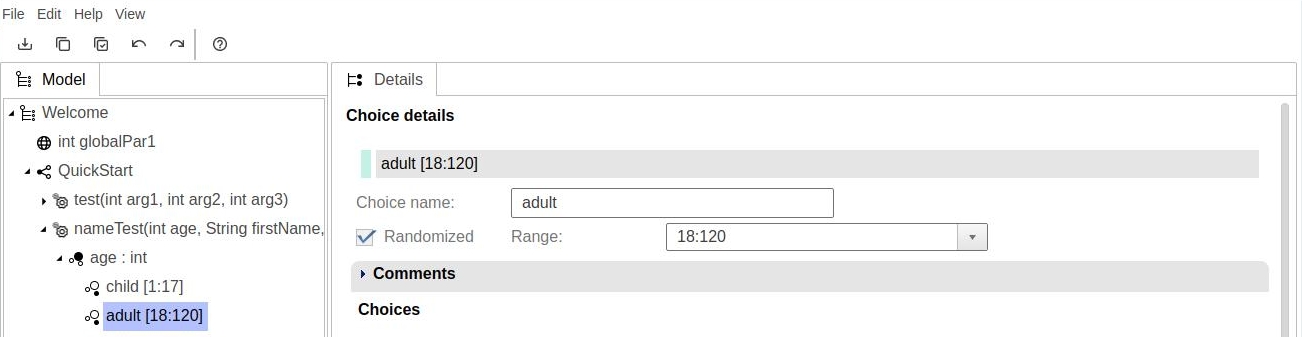
Randomized choices
In many cases user is not interested in a concrete value, but rather in range of values. EcFeed supports this case by so called randomized choices. Values of randomized choices are not defined until the test is executed or exported (described later).
In order to define a randomized, numeric choice user should enter range of values instead of single value.
Example: choice name: adult, range of values: 18-120
Randomized choices for parameters of String type can be defined with the use of pattern.
The pattern uses regular expression syntax.
Example: drivers license ([A-Z]{1}[0-9]{7})
Ambiguous numeric ranges
With randomized choices user should avoid defining numeric ranges which overlap. Then the result of evaluation of constraints (described later) would be ambiguous.
For example:
- 1:5 < 6:7 is always true.
- 1:5 > 6:7 is always false.
- 1:6 > 5:7 is ambiguous because it can evaluate to true of false depending on the actual values which would be generated randomly based on these ranges.
Constraint can evaluate to false if randomly generated values are for example 1 > 5. Or it can evaluate to true in case: 6 > 5.
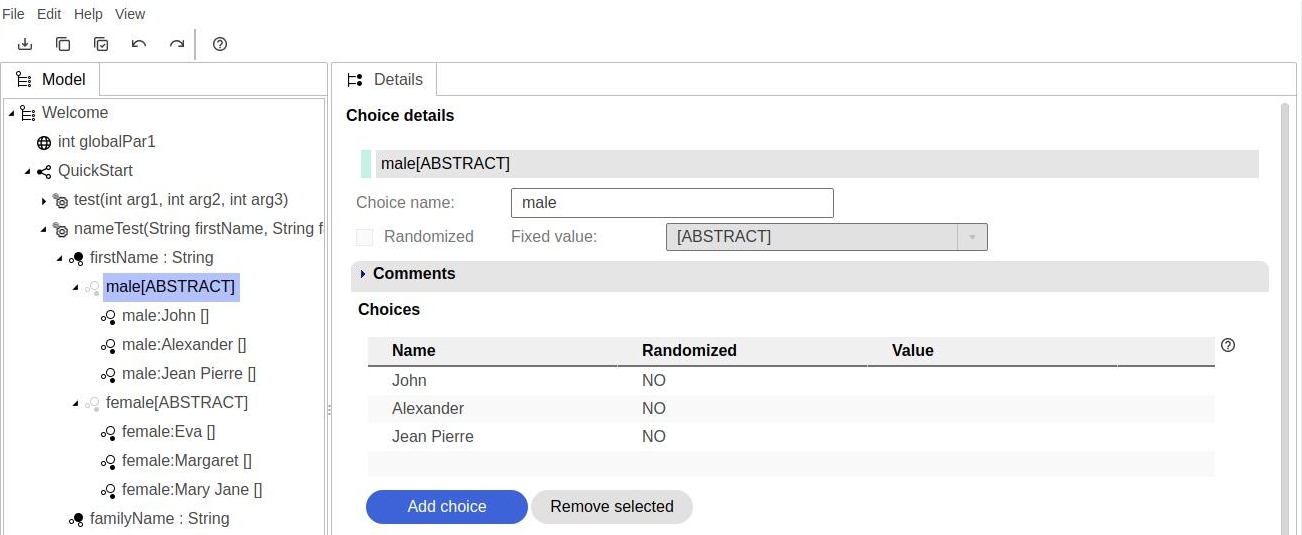
Grouping choices - abstract choices
Grouping of choices is used to simplify definition of logic conditions used in data generation - constraints (described later). For example first names could be grouped: male (John, Alexander, Jean Pierre), female (Eva, Margaret, Mary Jane).
Creating hierarchical groups of choices: select parameter firstName > add choice "male" > select choice "male" > add choice "John" etc.
Choices which have children choice nodes are called ABSTRACT. Abstract choices have no value.
User can create more then one level of hierarchy. Abstract choices can have children choices which are also abstract.
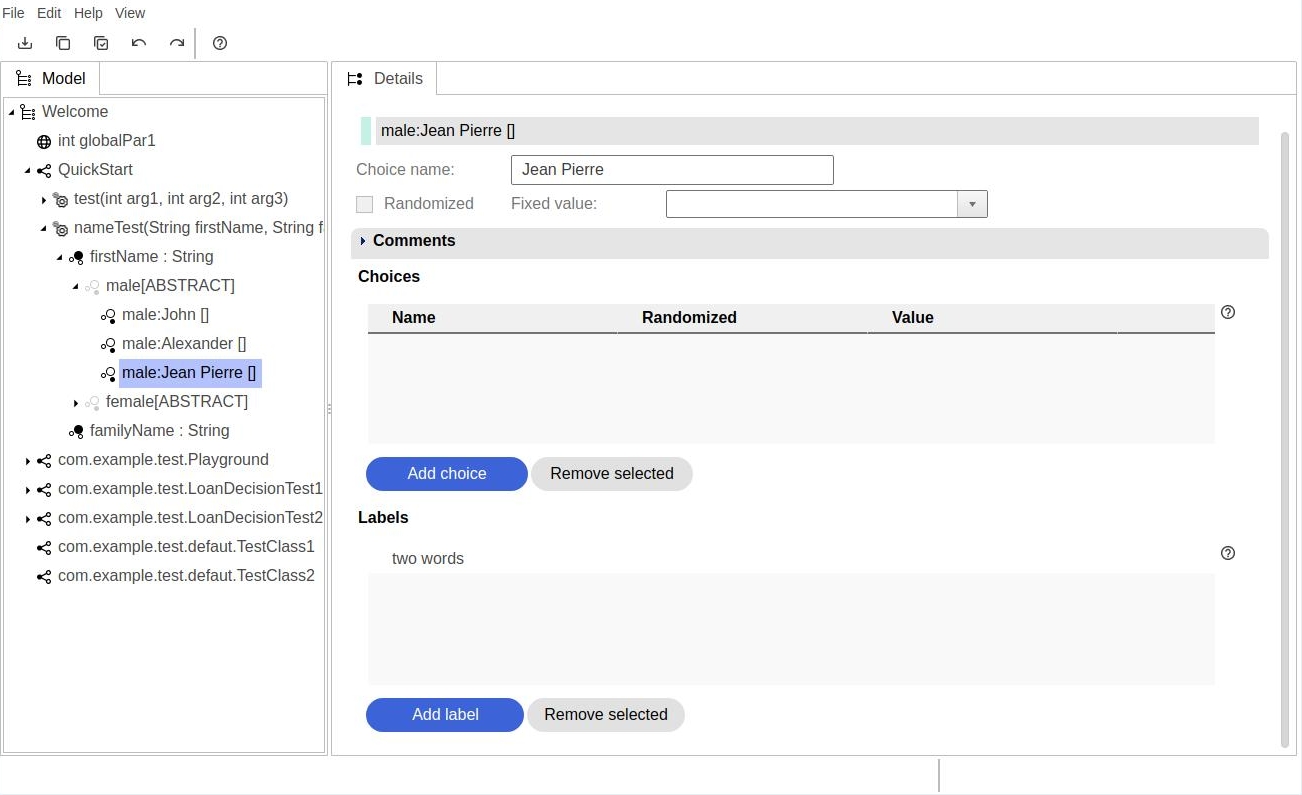
Grouping choices - labels
Sometimes another grouping of choices is needed. For example first names could be grouped as "one word" and "two words". Choice label can be used for this purpose. Choice labels can also be used in constraints.
Adding choice label: select choice > in properties window click "Add label" button > type label.
Constraints
Constraints are logic conditions (sometimes quite complex) which are used during test data generation process to:
- filter-out unwanted test cases (filtering constraints).
- calculate and assign values to expected parameters (assigning constraints).
During data generation process generates constraints are evaluated for each test case in order of definition.
Constraints can be defined in constraint editor.
Combo-box "Constraint type" in properties window defines type of a constraint.
There are three types of constraints:
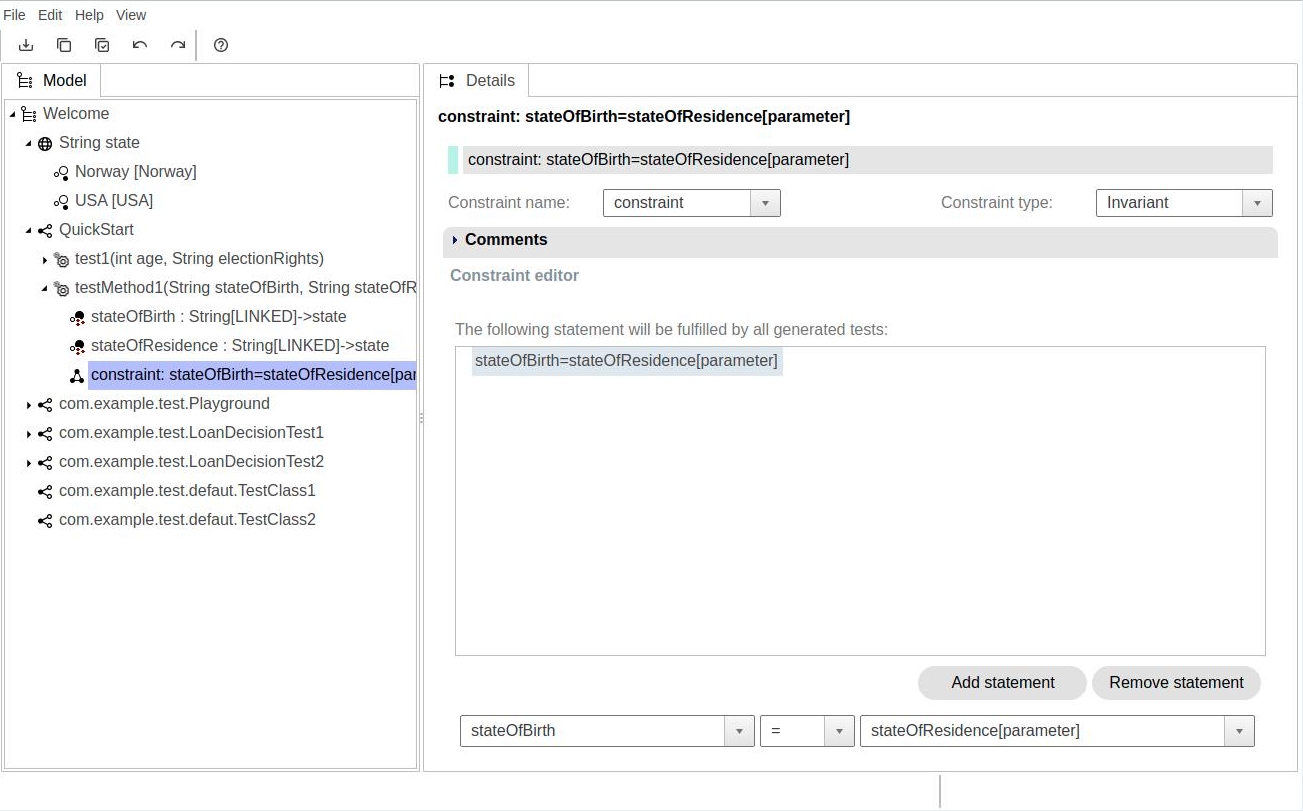
- Invariant
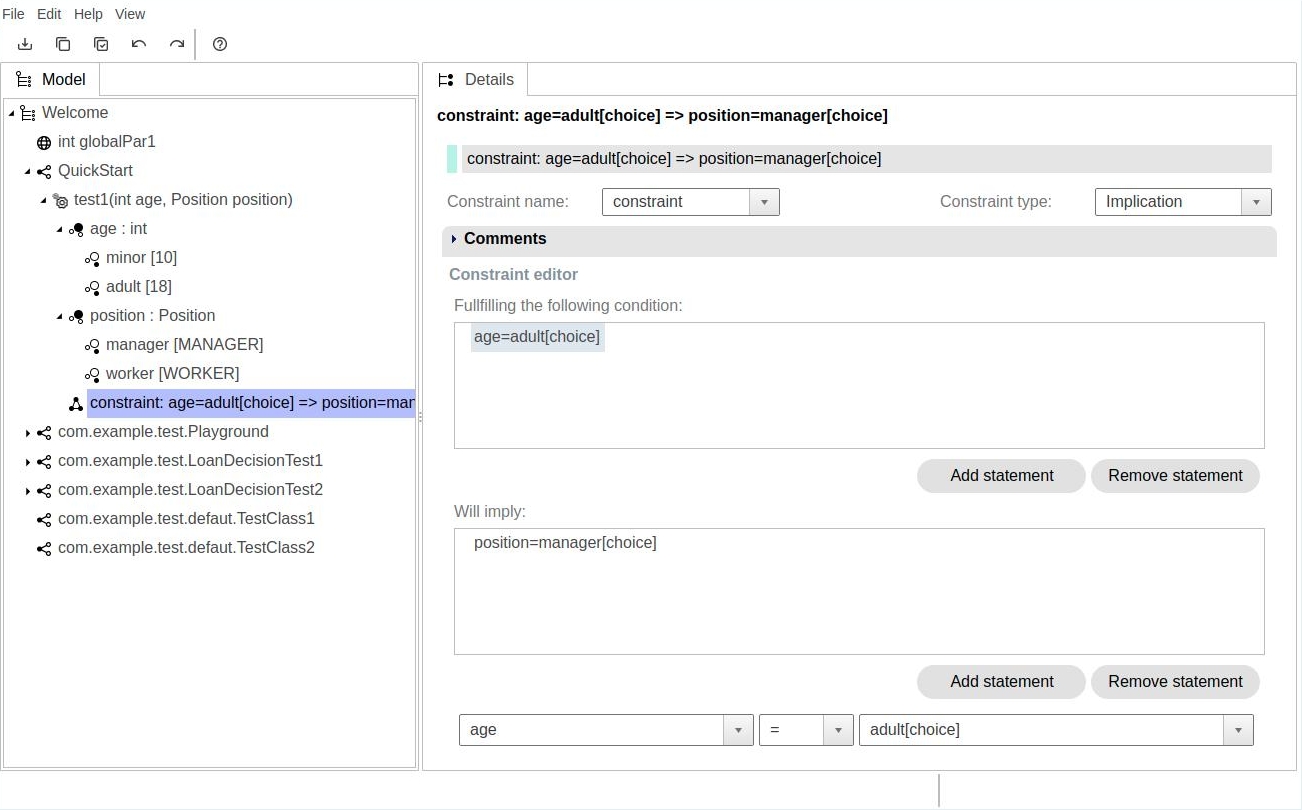
- Implication
- Expected output assignment
Invariant constraint
Invariant constraint is a filtering constraint. It has one logic condition. If this condition evaluates to false, the test case is excluded from generation results.
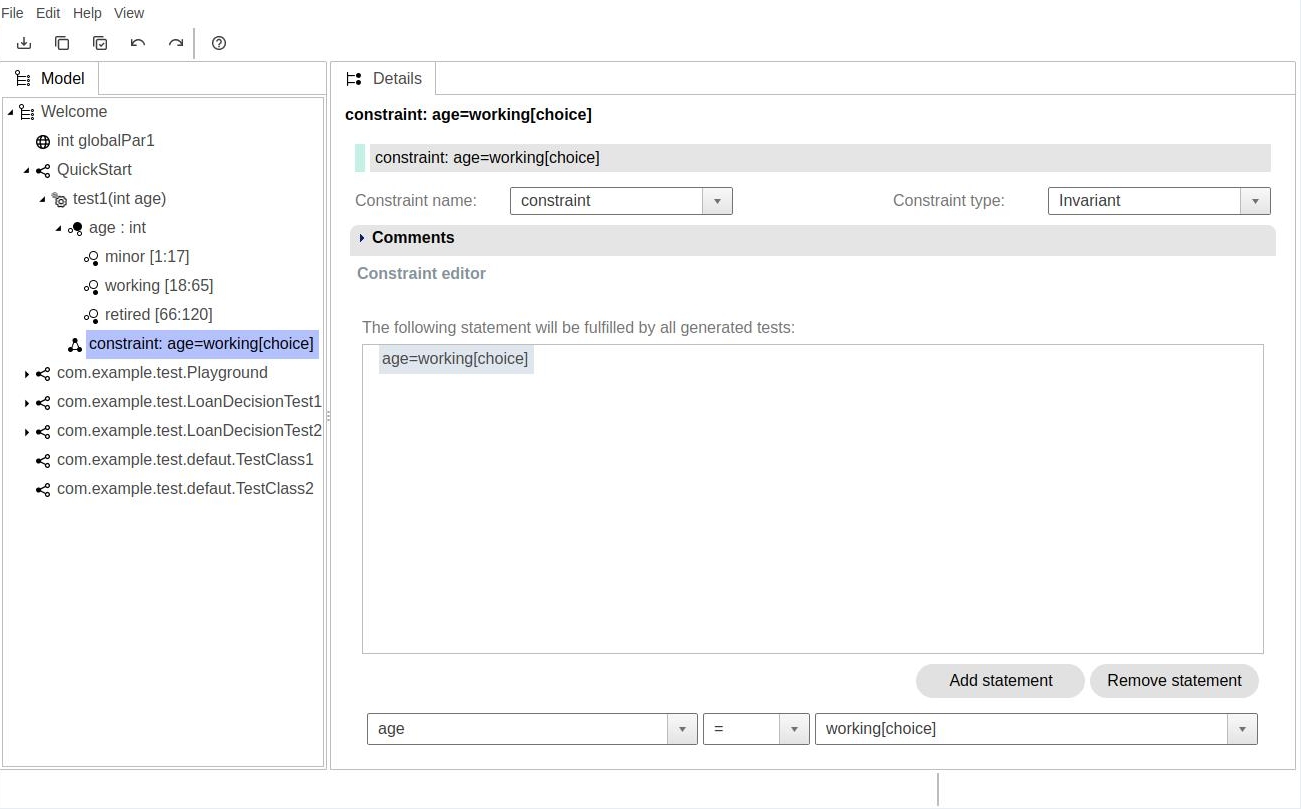
For example (as on picture above) if user wants to exclude people of age from 1-17, and 66-120, the defined condition would be: age=working[choice].
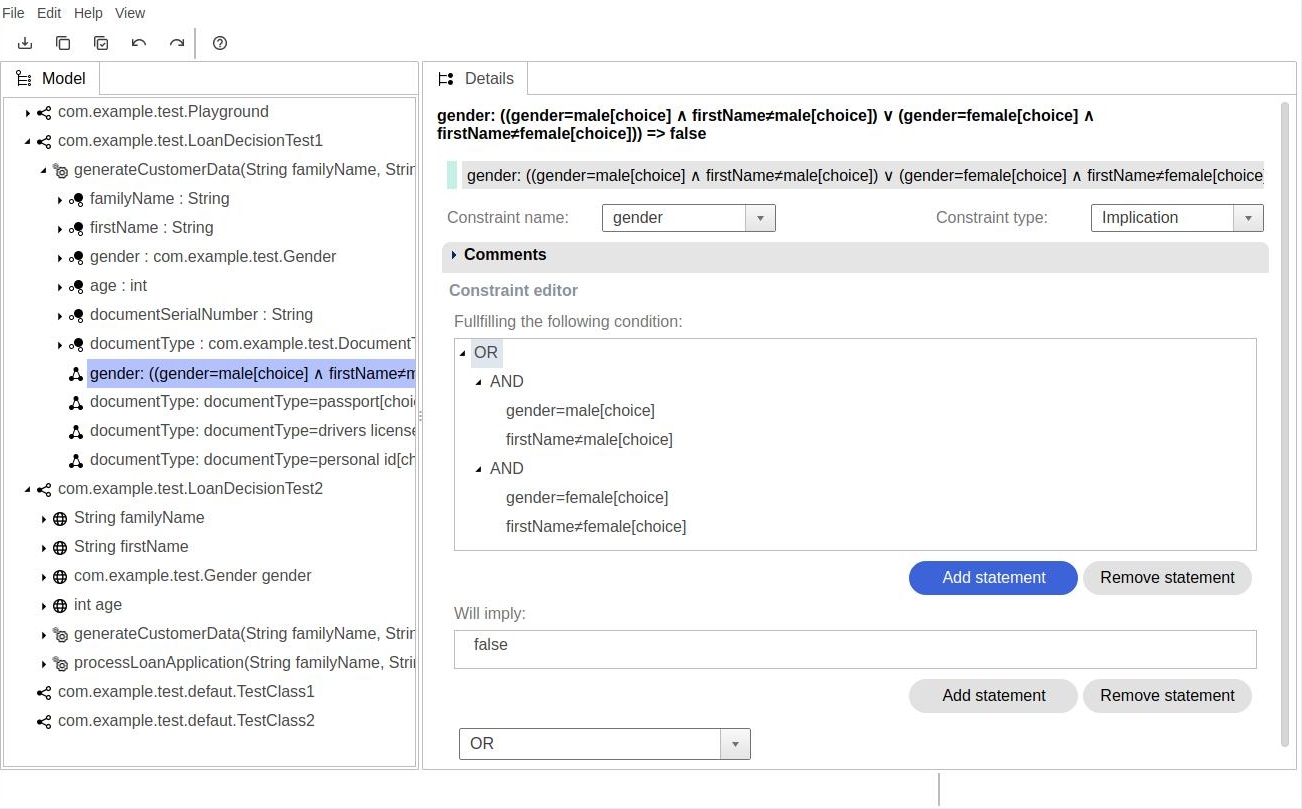
Implication constraint
Implication constraint has two logic conditions: precondition and postcondition. Precondition is a preliminary filter, which qualifies test cases for further evaluation. If precondition evaluates to false, evaluation of postcondition is skipped and the test case is not excluded from generation results (constraint evaluates to true). If precondition evaluates to true, then postcondition is evaluated. If postcondition evaluates to false, the test case is excluded from generation results.
Assigning constraint
Assigning constraint does not filter test cases. Instead it assigns a value to an expected parameter. Assignments to multiple parameters is also possible. Assigning constraint has one logic condition and assignments window. If logic condition evaluates to true, the assignments are made. Otherwise the default value of expected parameter is assigned.

Statement editor
Statement editor is located at the bottom line of constraint editor. It allows user to define basic logic conditions.

The editor contains three fields:
- left operand
- operator
- right operand
Left operand is always the name of one of parameters which are not marked as expected.
Value for the right operand is one of:
- Typed value. User can type this value directly in right operand field.
- Value taken from choice e.g. age = adult[choice]
- Value taken from another parameter e.g. stateOfBirth = stateOfResidence[parameter] (example below).
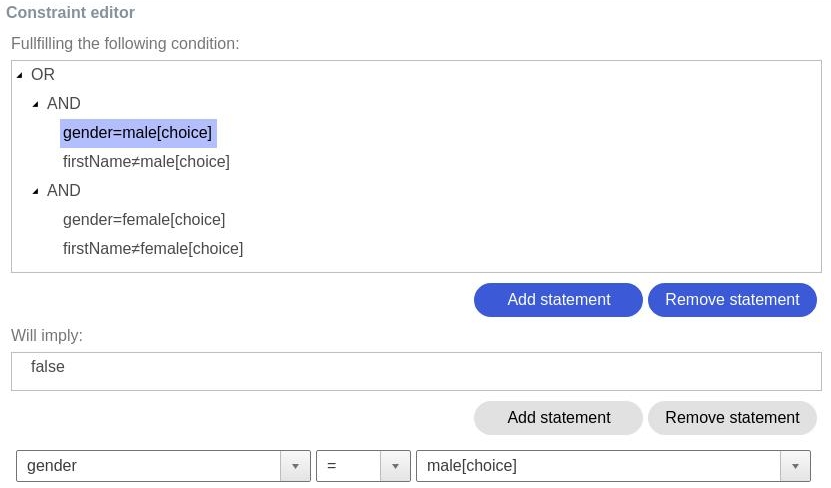
Complex conditions
Complex logical conditions may be created using simple statements and logical operators.
Logical operators are AND, OR. They can be nested.
In constraint editor, logical operators stand before statements, to which they refer.
Data generation
Data generation takes model with constraints as source and creates a list of test cases.
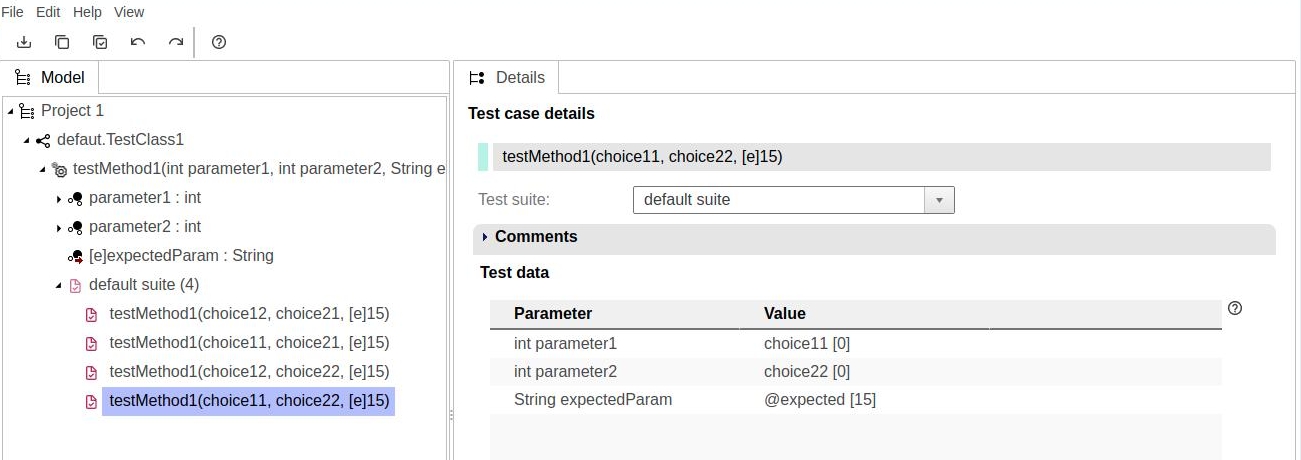
A test case contains:
- symbolic names of choices for non-expected parameters
- concrete values for expected parameters
Generated test cases contain combinations of choices assigned to method parameters.
Their order is the same as parameters in method: choice from parameter 1, choice from parameter 2, etc.
Expected parameters are excluded from these combinations. Their values result from default value of expected parameter or evaluation of assignment constraints.
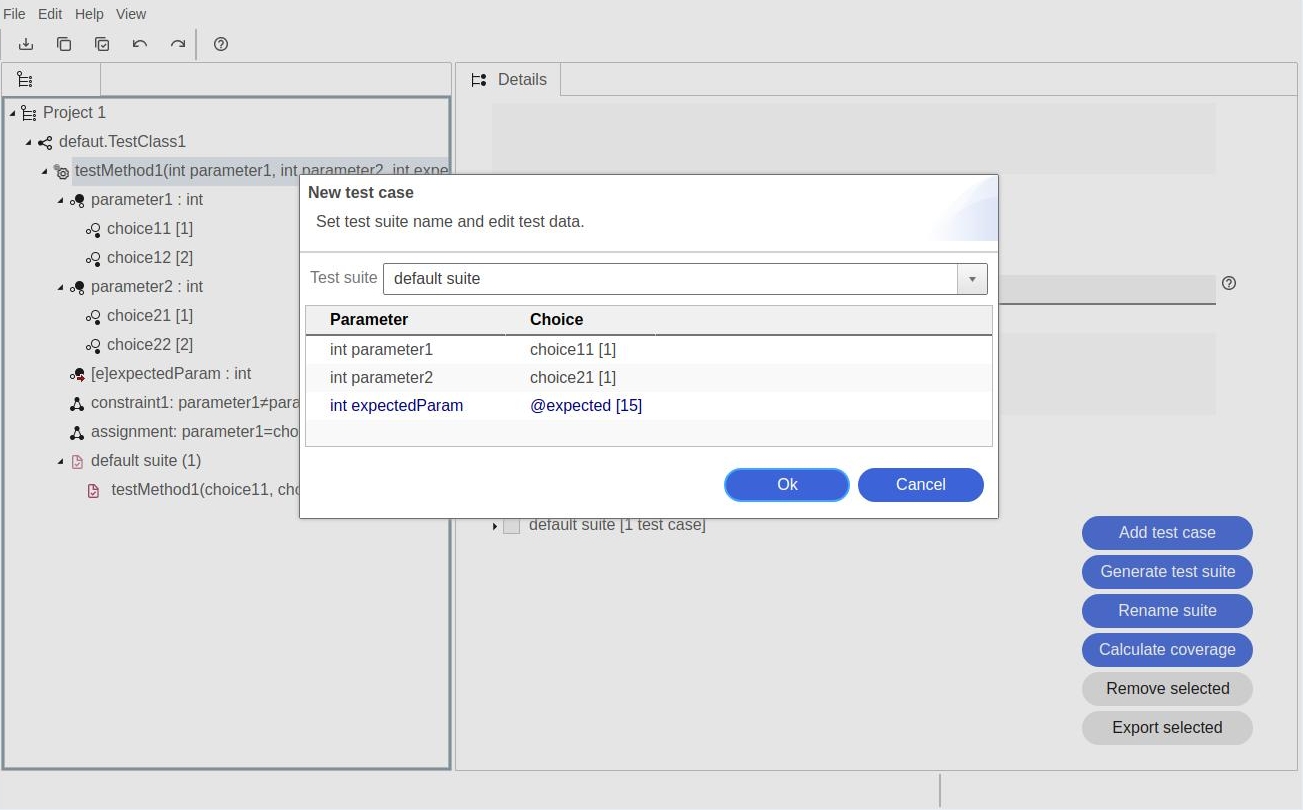
Expected values are displayed as @expected[15] (longer convention) or [e]15 (in model explorer).
Generated test cases do not strictly belong to data model.
However they are placed under method node, from which they were generated.
Test suites group test cases to simplify project navigation.
Data generation dialog
To display test data generation dialog: select method > click on properties window > scroll down > click button Generate test suite.
Data generation dialog will be displayed.
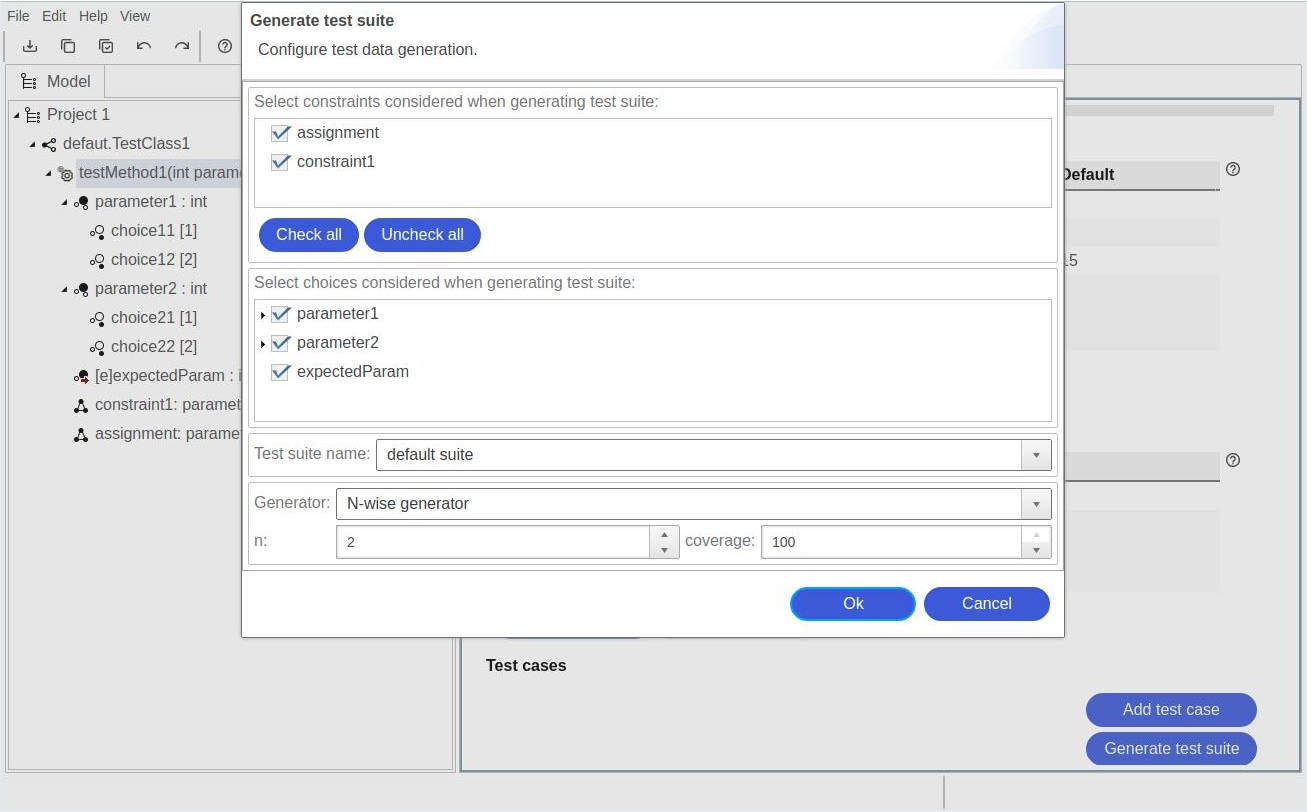
Dialog contains
- List of constraints.
- List of choices.
- Test suite name for test cases which will be generated.
- Type of generator with its parameters.
In most cases all dialog parameters, can be left without change. To start generation click Ok button.
Types of generators
Three types of generators are available:
- Cartesian generator creates set of test cases which covers all possible combinations of parameters values. This is the most time consuming generator. It also produces the greatest number of test cases.
- N-Wise generator creates test cases which contain N-tuples (e.g. pairs for N=2) of parameter values. If coverage parameter is 100, all possible N-tuples are included in generated test cases. If coverage parameter is less than 100, the number of included tuples will be decreased proportionally. Coverage is calculated before constraints are applied. So the number of covered tuples after evaluation of constraints could be much smaller or even there would be no tuple at all. N parameter should be mostly chosen as 2 or 3. Larger numbers of N parameter will be time consuming and generate big sets of test data.
- Random generator generates test cases with random choices. Number of generated test cases will result from "Length" parameter. As default, the generator will generate test cases without duplicates. Field "duplicates" controls this behavior.
Adding test cases manually
Test cases can be also added manually: click "Add test case button" in method properties > in dialog "New test case" choose values for all parameters > Click Ok.
Export of generated test cases
Generated test cases can be exported to a custom text format.
Exporting test cases: select method > in properties window, in section "Test cases" select test cases to export > click "Export selected" button. "Export test suites" dialog will be displayed.
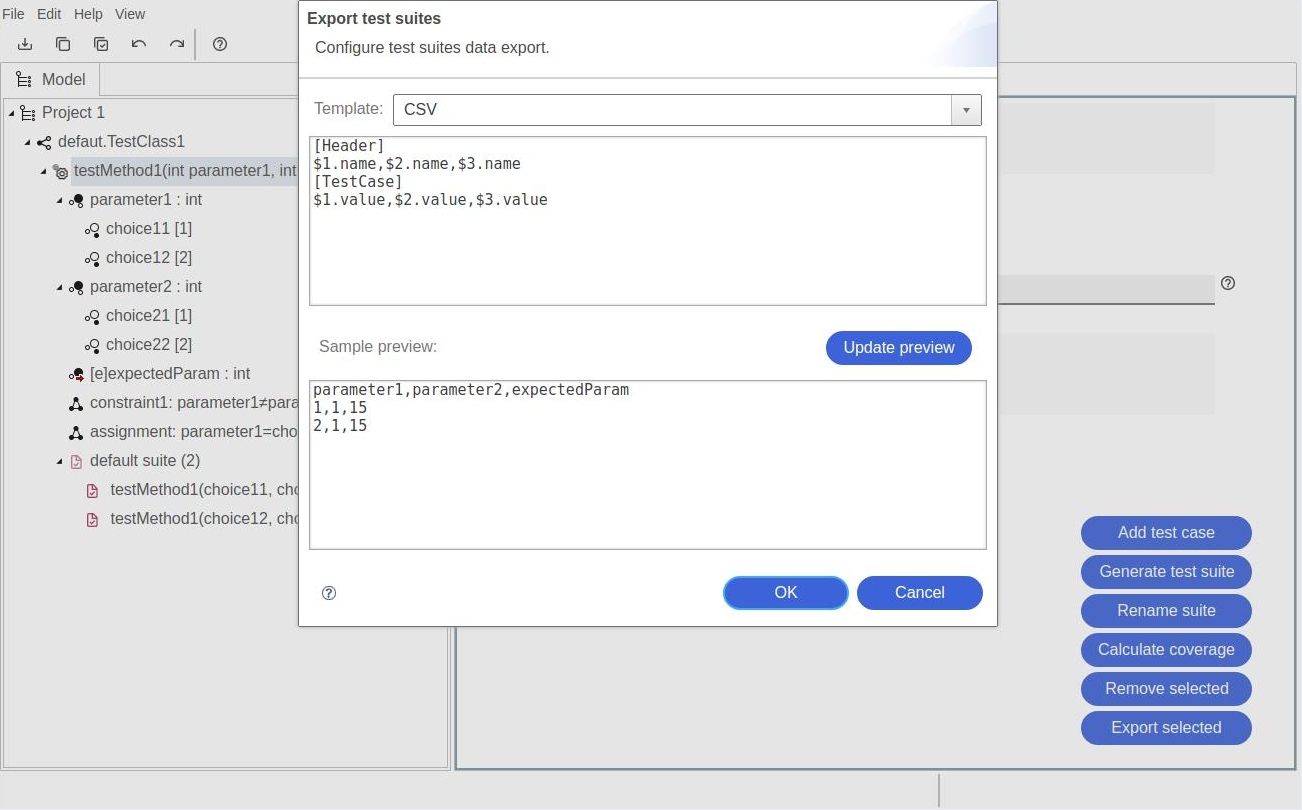
In "Template" combo-box one of four templates can be selected: CSV, XML, Gherkin, JSON. Default template text is displayed below template type. It can be edited to user's needs. Button "Update preview" generates "Sample preview" of data using the template from above. Click Ok do export test cases in defined format to local computer. Data file will be downloaded to default download folder.
Export on line
User can export test cases during data generation. Click button "Export online" in method properties window.
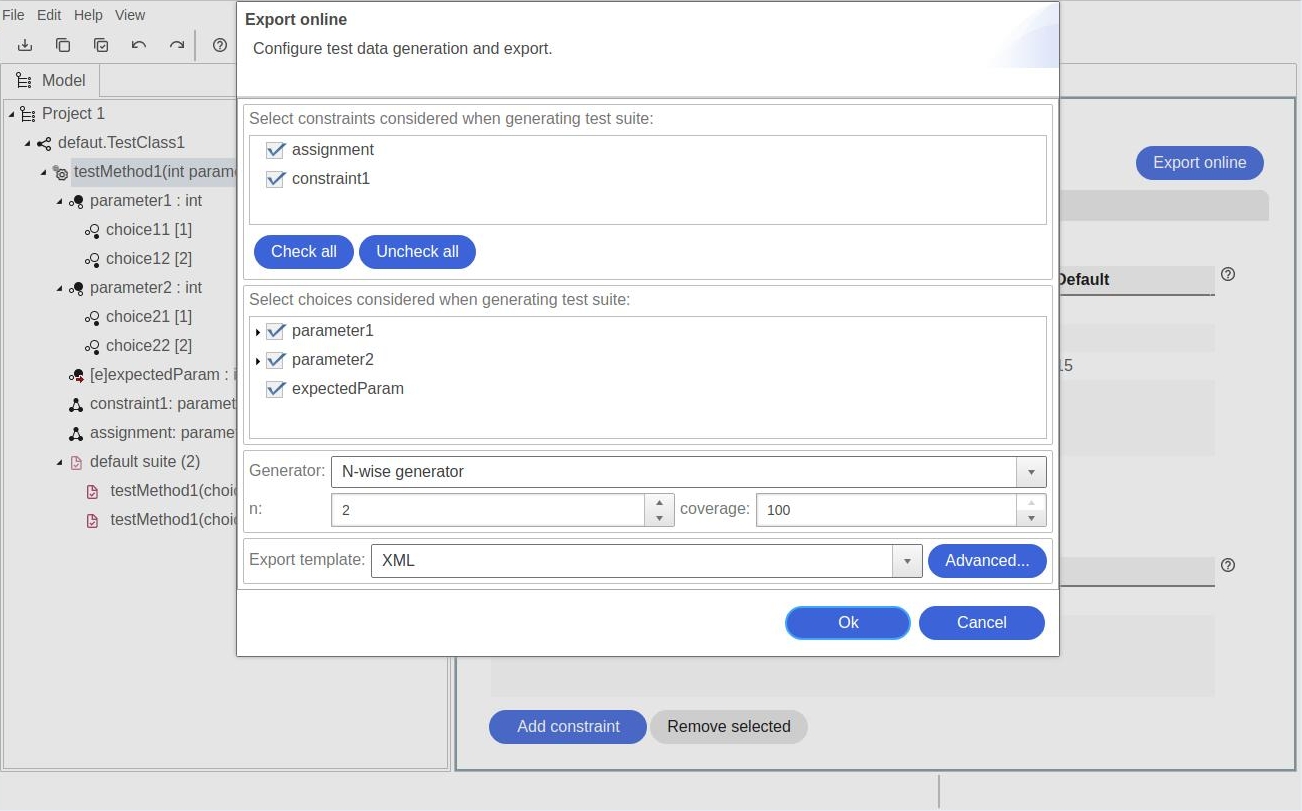
Compared to standard data generation dialog it has additional section which allows to choose export template.
Export and import of model
Current model can be saved to user's computer via export function.
Exporting current model: go to Main menu > choose option "File" > choose option "Export".
Model file in XML format will be downloaded to default download folder.
Previously exported model in XML format can be imported to current editor. Remark: the former model from editor will be removed.
Importing model: go to main menu > choose option "File" > browse for file > confirm import.